Learn the Basics of 3D Art and Improve Your Skills Fast – Part II
June 5, 2021In this article, we will continue our exciting journey through the basic steps in creating successful 3D art. The goal is to give you a general overview of the processes you have to work through. Should you need more details on any of the particular stages in 3D art creation, please review our more detailed guidelines in the blog’s library.
Apply Shading
Shading is both an extremely fun and a vastly intricate process. The fun part consists of determining the types of shaders that you are going to use. At the same time, shading also involves a lot of technical work, because you need to adjust the different numbers in a shader to achieve the various types of desired effects.
There is, however, one major skill you have to possess to perfect your shading: the excellent knowledge of how light functions in the real world. To fulfil this goal, it is a good idea not only to observe the physical reality around you but also to explore how other artists have recreated light in their works.
There are a few basic shading concepts you need to familiarize yourself with before you proceed. We will list them briefly below, and you can explore our other articles for more details:
- Refraction
- Reflection
- Diffusion
- Subsurface scattering
Work on Rigging and Animation
If you still have not come across the term, rigging is the process where you have to build a skeleton inside your model. This is a very important step that unites modelling and animation. Beware that it involves applying a lot of logic, math, and physics.
While being a highly technical process on one hand, rigging is also very creative. The artistic part comes mainly from trying to define how the skin moves around the different body parts. This is a very enjoyable progression to both watch and create. Thus, we can say that rigging consists of two parts: inserting the skeleton inside the model and defining the skinning.
When it comes to animation, as the name suggests, this is the stage where you make your object move. It is a very intense process, as you are literally breathing life into your model. To see some of the most successful animations of the last decade, please refer to the video below:
Scripting
Scripting is the process of applying programming to your 3D artwork. The particular programing language differs according to the specific application. The goal of this process is to help you automate tasks to save time and effort.
Simulation and Effects
Another way to save time and achieve a maximum realistic result is to employ simulation and effects. Not always is it necessary to animate everything, and this approach is designed to be used on such occasions.
Craft Cloth
Another necessary step when you have dressed characters is to apply cloth simulation. There are plenty of tools to help you with this goal to achieve a realistic effect.
Emulate Rigid Bodies
Have you ever seen dominos falling over each other? Well, this is rigid body emulation at work. Most often, the technique is used in scenes where you have to destroy physical objects, such as buildings.
Other Types of Simulations
There are several other types of simulations that artists typically employ in 3D. These include hair, muscles, the fluids (smoke, fire, water, and particles), and crowds. To recreate these, you can use different types of software depending on your purposes.
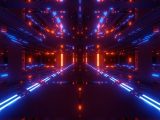
Determine the Lighting
Lighting is a very important phase of your 3D art project, as it sets the entire tone of your work. There are different types of lighting settings, where you can adjust parameters like brightness, colour, sharpness, and so on. The kinds of lights also vary. Some of them include spot lights, area lights, point lights, directional lights, etc.
Rendering
Rendering is the final stage, where you bring everything to life. While it may seem simple, rendering is way more than just pressing a button. Sometimes, this process can take a lot of time. Therefore, you need to be aware of techniques to make it faster while preserving the quality of the end product.
Conclusion
Now that you are familiar with all primary stages of creating a 3D art project, you are equipped with the knowledge to start your work. Although the steps described above may seem complicated at times, please remember that there are various kinds of tools to help you on your way to creating the desired artwork. Starting from the very beginning, one such example is the Roadkill UV Tool, which is used to produce UV “wraps” to move an object from 2D to 3D. There are also dedicated software products to use in each of the 3D artwork creation stages described above, which you can learn more about in our other articles.